The Screen editor is used to layout or configure the M&C windows called user screens used in the M&C user interface.
The Screen Editor works like a simple drawing program. Each M&C user screen contains a number of objects ( elements ) which may be placed, sized and edited using the screen Editor.
Toolbar
The toolbar options and their functions are described below. If you move the mouse pointer over the icon, the tooltip is displayed with a brief description.
Toggle screen list: Clicking on arrow to left (<, >) toggle the screen list.
Create new screen: Opens a create new screen dialog.
Save screen: Save the modifications.
Save screen as: Save the selected screen under other name.
Delete screen: Delete the selected screen.
Add element: Opens a panel on the right side to add an element.
Insert screen: This option is used to insert an other user screen elements to selected screen.
Duplicate element(s): Duplicates the selected element(s) with there properties. The new element(s) appears on top of existing one.
Delete element: Deletes the selected element(s). You can also use backspace or delete key to perform this action.
Edit element: Opens a element properties panel on right side of selected element. You can also use double click to edit element.
Select element type: This option is used to select all elements according to their type. If you click on this option, an input field would be displayed. When you start typing, the element list is filtered and you can select an option. All elements with the type you have selected from the option will be selected.
Select all elements: Select all elements. You can also use ctrl + a.
Grid positioning: Elements are placed along a invisible 3 x 3 pixel grid if they are moved while this options in on.
Push element to background: Moves the selected element to the back so it does not cover any other element.
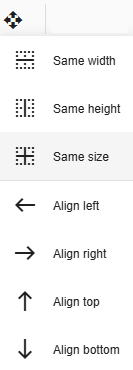
Alignment: Aligning a group of elements. The first selected element is the parent element, i.e. the properties are transferred from the parent element to the child elements.
Undo: To go to previous change. Can also be used with ctrl + z.
History: All changes made by a user are saved in the history. If you click on the clock symbol, a list of all changes is displayed with the number and date-time (1: yyy-mm-dd HH:mm:ss). If you click on an option, you will be taken to this specific change.
Redo: To go to forward change. Can also be used with ctrl + y.
Help: Bring you to help page of screen-editor.
Shortcuts: List of all key combinations.
Screen List
List of all saved screens on the server. Select the name of the screen you wish to edit.
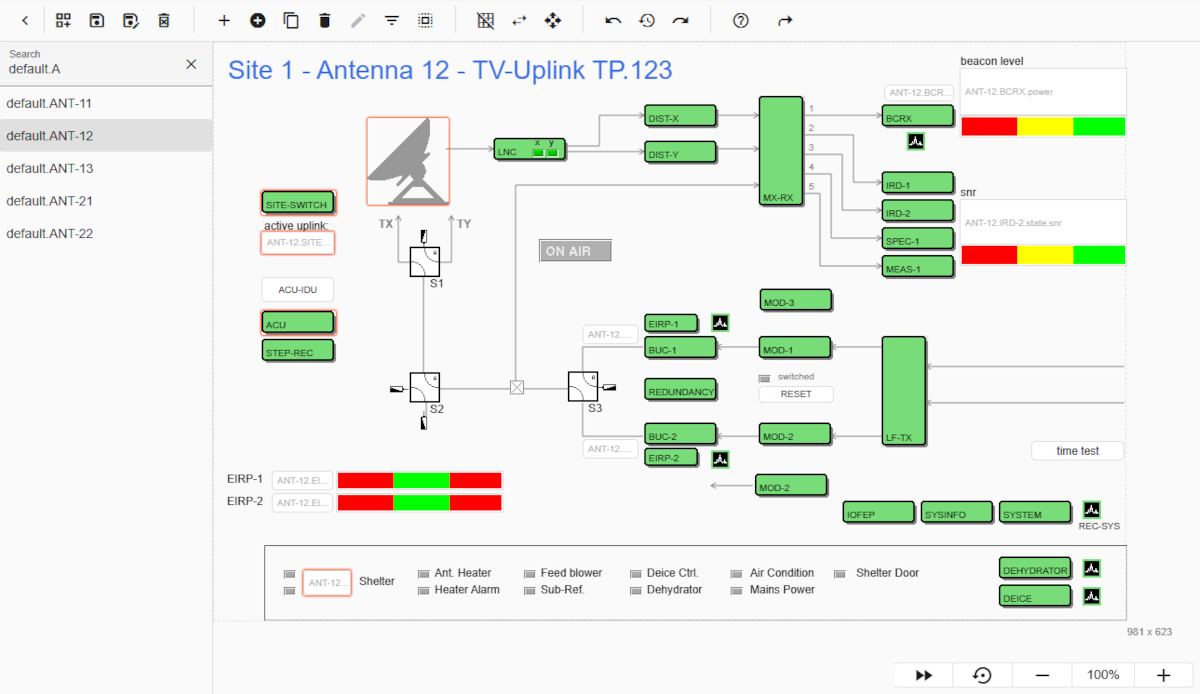
Editing area
After selecting the screen, the screen elements are loaded into the editing area on the right-hand side like in image above. If you look closely, some elements have a light red border, which means they are selected. You can simply start dragging, resizing, etc. to perform functions. The functionality is described next in functionality section.