 key. To leave the menu, repeatedly press the
  key until the display screen appears again. If there are no keystrokes for 2 minutes, the unit automatically leaves the menu and returns to display mode.
The menu mode lets you view and change settings of the sat-nms LFTX/RX. From the display mode, you enter the menu by pressing the key. To leave the menu, repeatedly press the key until the display screen appears again. If there are no keystrokes for 2 minutes, the unit automatically leaves the menu and returns to display mode.
Depending if a slot is configured as a RX or TX slot, the structure changes in some parameters. The following diagrams shows both possibilities (Slot 1 -> RX, Slot 2 -> TX).
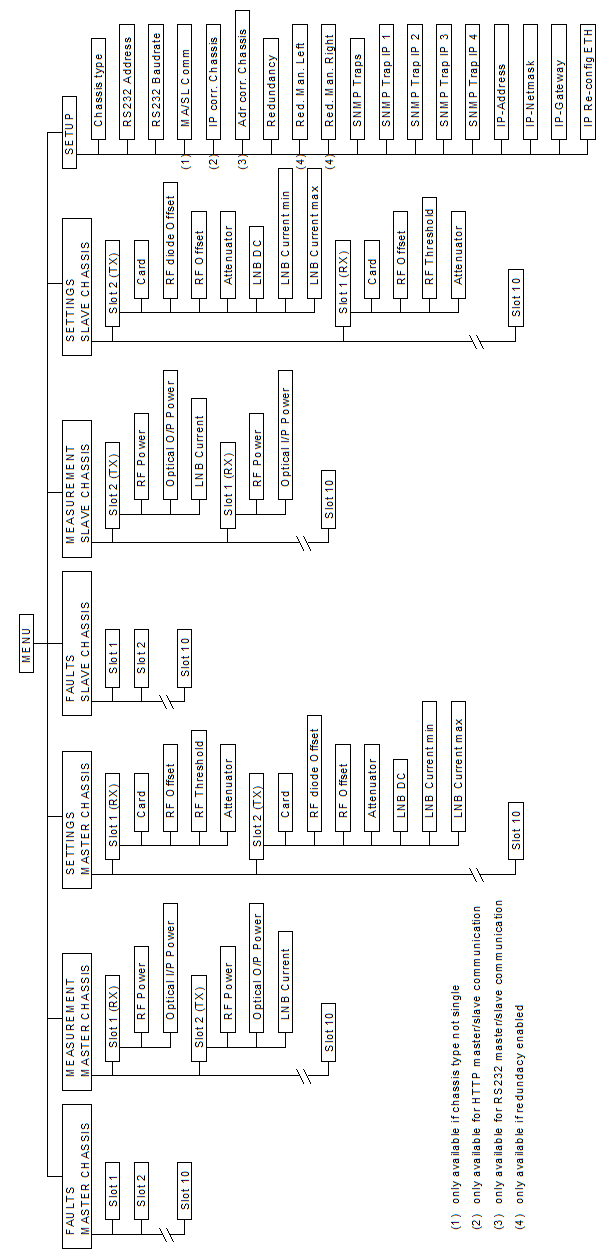
The menu structure depends also if the chassis is configured in single or in master/slave mode. The structure is shown in the two diagrams below. The first one shows the menu structure of a single unit, the second shows the structure of a master/slave unit.
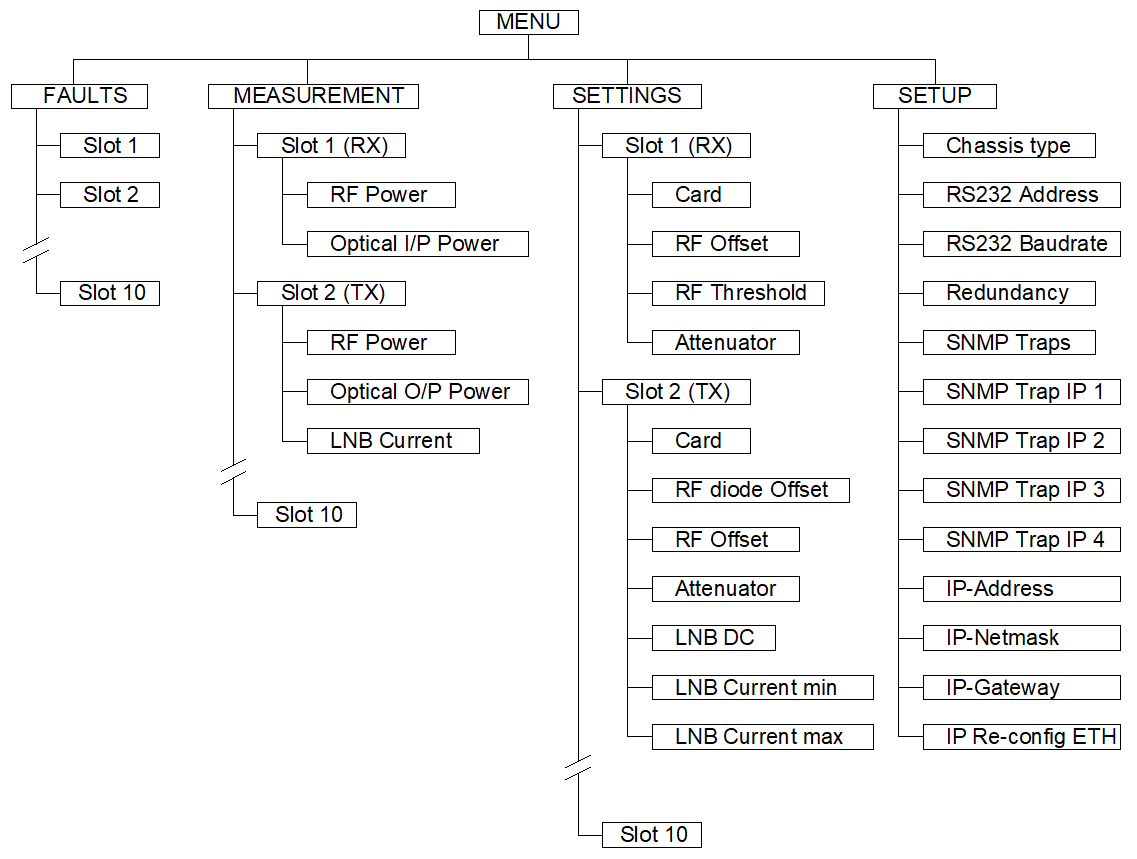
The FAULT sub menu shows you the state of every slot. The MEASUREMENT sub menu gives an overview over the actual measurement values for every slot. The SETTINGS sub menu lets you view and modify the operational parameters of the LFTX/RX. The SETUP sub menu contains a number of parameters which usually only need to be changed during the installation of the optical link.
For further information about the parameters see the chapters Operational Parameters and Installation Parameters of this manual.
To navigate in the menu, use the  or
or  keys to select a sub menu, then press to descend in the selected menu branch. Pressing ones returns to the main menu level, pressing it twice returns to display mode.